
360° videos are becoming more and more popular. It’s a great way to have a virtual tour. It adds a new interactive facet to a music video, or a neat way to show off some new cars.
We at DVS have been digging to the world of 360° video recently, so I wanted to give you an inside look at the process of working with the footage to make that cool looking 360° video.
Our 360° video rig is a 6 camera setup. That means that when everything is done, you end up with 6 streams of video that you need to sync up, edit and stitch together into the final video. The software we use for that is Kolor’s Autopano Video Pro with Autopano Giga. Autopano Video Pro will allow you to sync and stitch together the videos, while Giga gives you a ton of control over how the videos assemble and stitch together as well as helping to smooth out color and exposure differences between cameras.
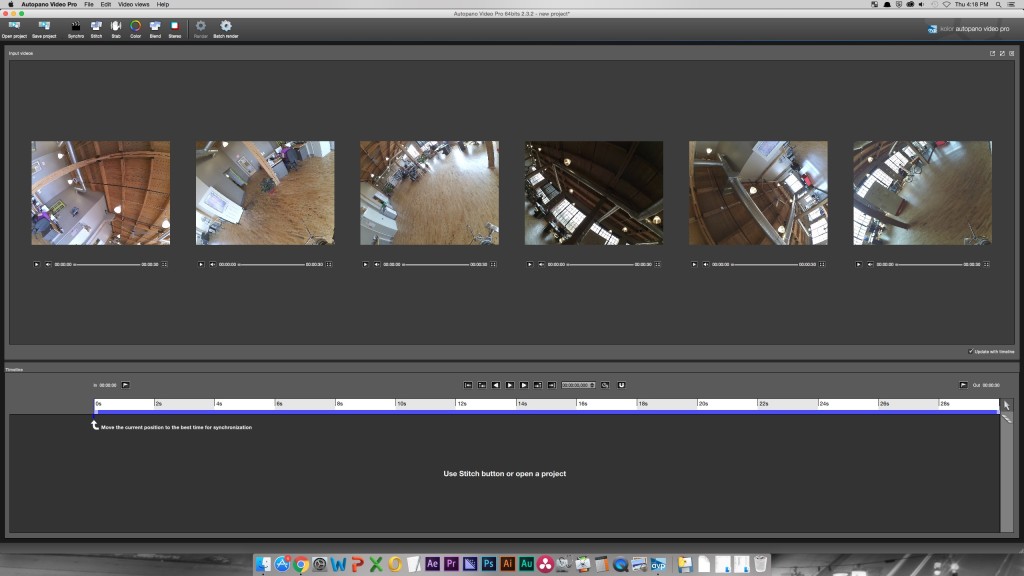
To start, I launch the Autopano Video Pro software and import the 6 streams of video. I then move the playback indicator down the timeline until I get to a point where I think it should be able to sync the videos. The best thing to do is clap your hands so there is an audio marker that can be used to sync the cameras. It also doesn’t hurt to have a visual marker as well, such as rotating the stand so the cameras spin for a second.
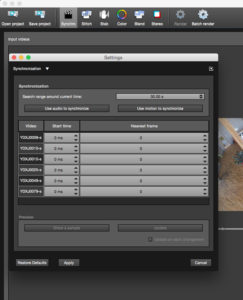 I can then click the sync button and have it try to sync via audio or motion. From my testing, this feature seems a bit lacking and I have had inconsistent results from it. Since the videos need to be synced exactly for this to work well, I have used Adobe Premiere to sync them, trim the ends and export each angle as a new clip.
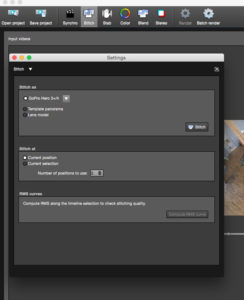 Once you have your videos synced, you click the Stitch button. You pick your camera setup (ours most closely matches the GoPro Hero 3+/4 setting) and click Stitch.
You can see a preview of what the video will look like now, which will look quite weird and probably will not have a nice straight horizon line. But that’s ok because you can easily adjust the position of the video.
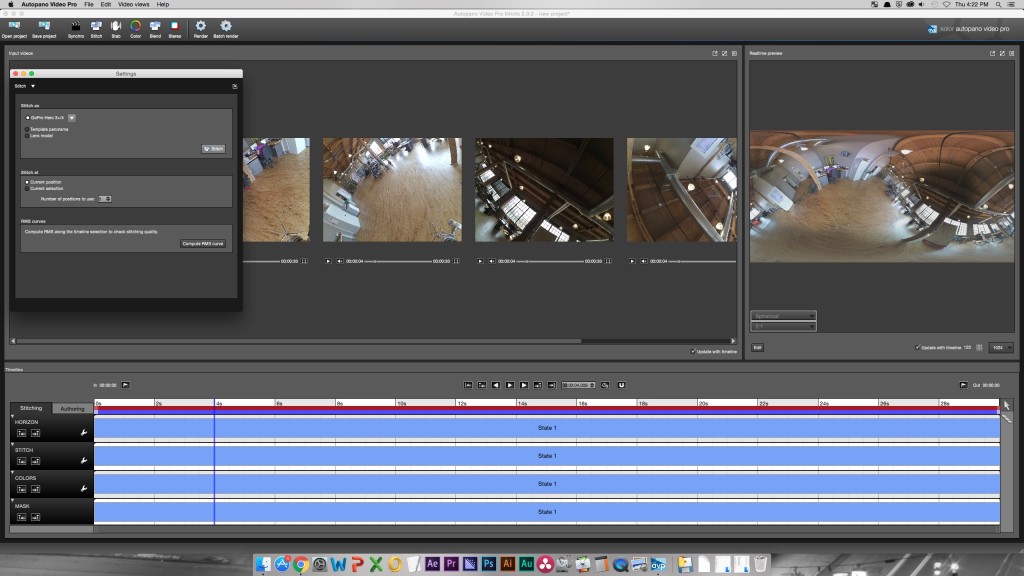
If you want to do some fast adjustments or only have a minor tweak to do, you can do it right in the preview window by clicking and dragging the mouse to rotate things around. A quick note: whatever is in the center of your preview will be what is the center of your view when the 360° video starts playing, so may sure to rotate the image around and center up what you want to start on.
If your image is still looking rather uneven, you can click the “edit” button under the preview to open Autopano Giga and dig into the more in-depth controls it offers.
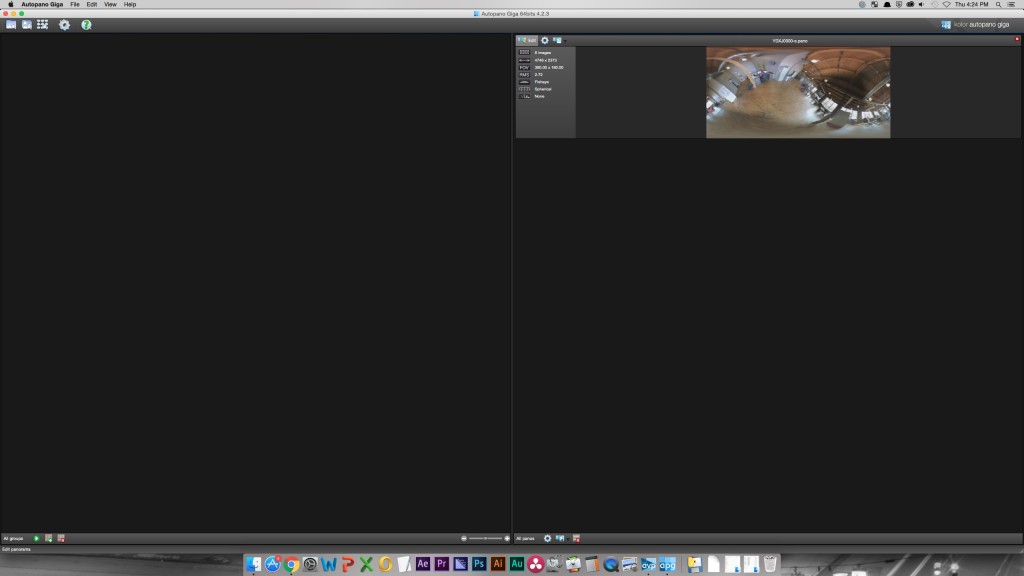
Within Giga, you click the Edit button and it opens up all sorts of options.
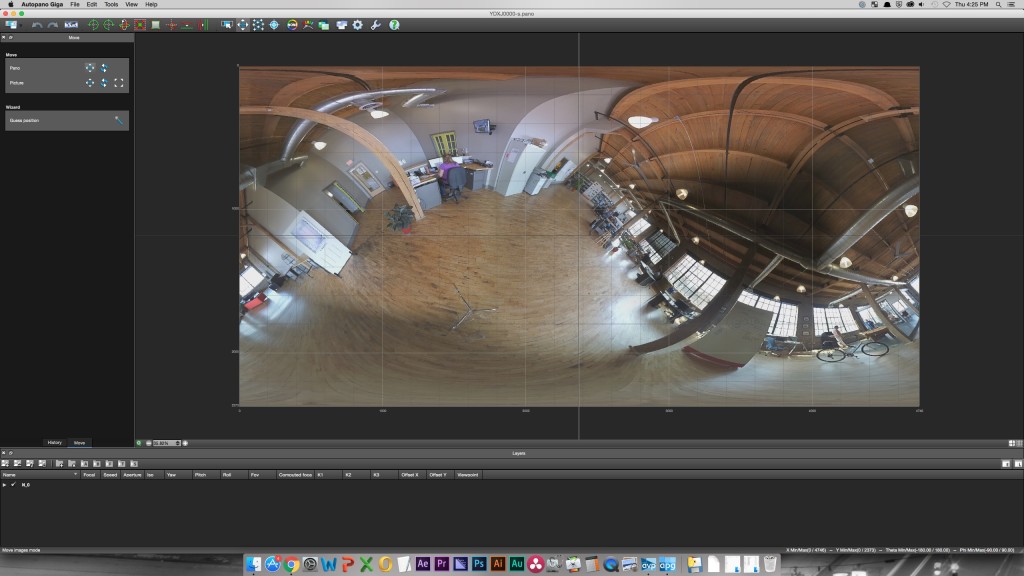
Start by clicking the Move Images button in order to move the cameras into a proper looking image.
You can then click the Mask Edition button. This mode allows you to select points that look better in one camera than another and tell the program to favor that setup to help blend the images together nicely. Clicking the Preview button down by the zoom indicator will help show where each camera’s image blends with the others. Make sure make to click the green check mark to save as you progress through each step.
You can adjust the color and exposure of each of the cameras.

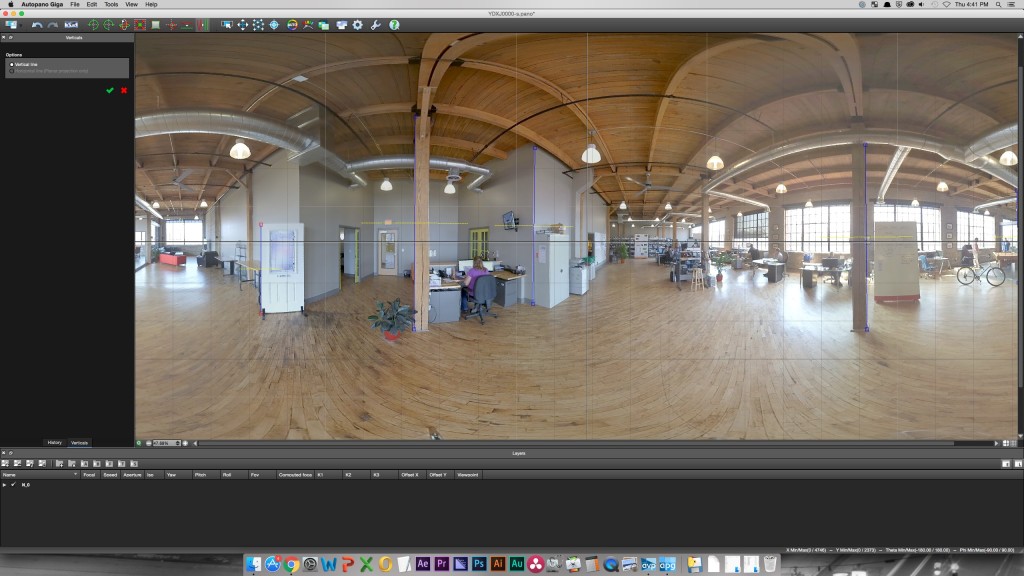
You can also select a tool that lets you draw what are supposed to be vertical lines and it will help re-balance the horizon line and make sure things are squared up.
When you are done, select File>Save to make sure things update properly. You can then switch out of Giga and back to Autopano Video Pro. Your video should be looking a lot better now!
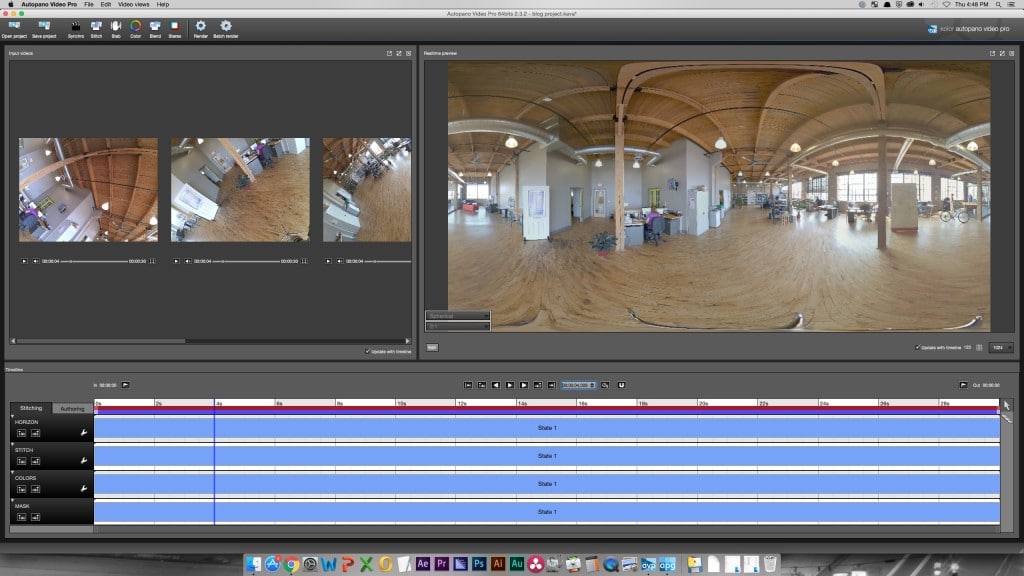
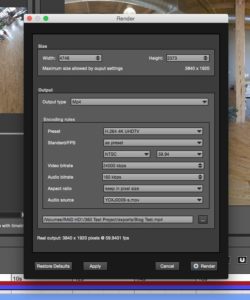
You can now click on Render and pick your settings. They are a bit limited, but if you plan on just taking the output to YouTube or something like that, you can go right out to an h264 file. Just make sure you set it to the same frame rate as your source video and you can use the 4kUHDTV setting which should work just fine.
![]() Now that you have your video output, you can put it right one YouTube and everything will be fine, right? Nope! Not quite yet. There is one more trick you need to do at this point. You need to download the “360° Video Metadata Tool” from YouTube. This little tool adds in the metadata required by YouTube to make sure it is flagged for 360° video so it will render properly.
Now that you have your video output, you can put it right one YouTube and everything will be fine, right? Nope! Not quite yet. There is one more trick you need to do at this point. You need to download the “360° Video Metadata Tool” from YouTube. This little tool adds in the metadata required by YouTube to make sure it is flagged for 360° video so it will render properly.
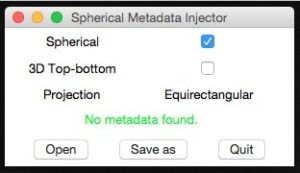 Simply open up the Metadata Tool and tell it to Open your h264 file that you exported out of Autopano. Click to turn on the checkbox for “Spherical” then click “Save As” to save the prepared file. This is the file you can upload to YouTube. Be warned, processing time for the 360° video can take a while. Short videos will take about 5 minutes or so to become interactive at super low resolutions. 1080p versions should be available soon after while 4k versions can take days to show up. That’s it! You now have a 360° video on YouTube! Be sure to check out our short virtual look at the DVS office!